

In July 2018, Google Adwords was changed to Google Ads. Though not much has changed in terms of how you set up your Google Ads account, for small businesses, there’s an added benefit of putting their brand power to work. You will learn about that and other features brought in by the last Google update in the coming posts, but for now, let’s set up your Google Ads account with best practices. Notice the emphasis on Best practices? As although setting up a Google Ads account isn’t much of an effort in itself, setting up a campaign-that-is-built-to-win is a much more challenging thing to get right. So if you’re ready to plunge deeper into the world of PPC like the best digital marketers out there, to get optimised and gain instant benefits of this miraculous tool, then let’s get started.
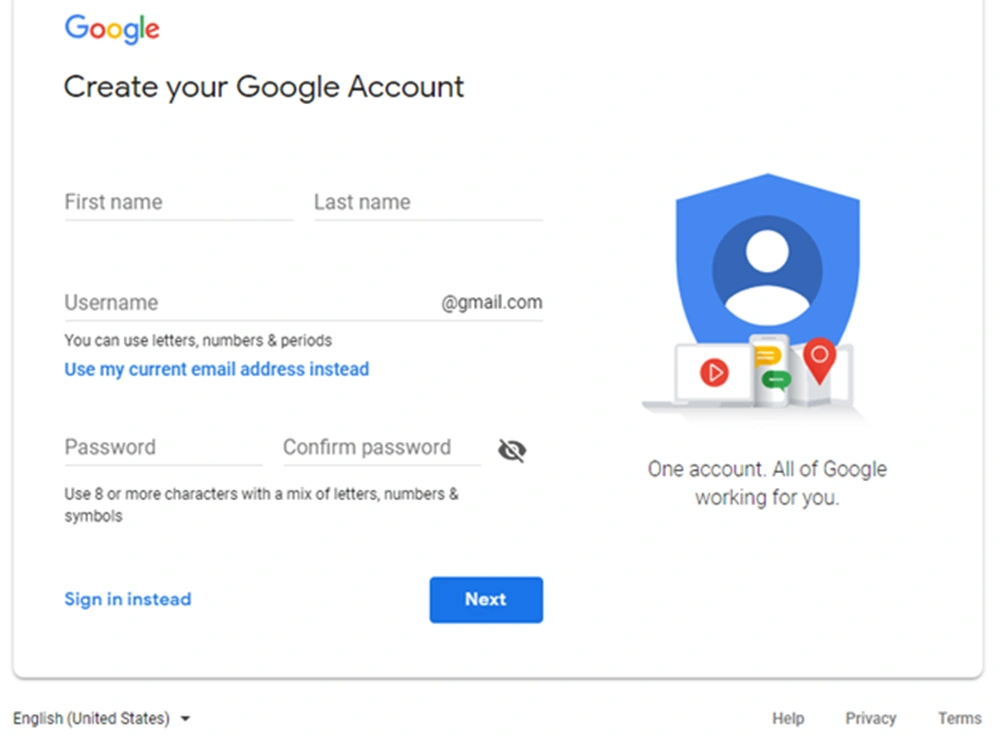
Most likely you already have a Gmail account, but if you’re really serious about getting into the PPC world of Google, you may need to consider making a new one. As you get more experienced with your PPC campaigns and explore more about keyword optimisation as well as A/B testing ad copies, you will start getting several emails from your Ads account, and you definitely do not want to mess your primary email account with all that rush.
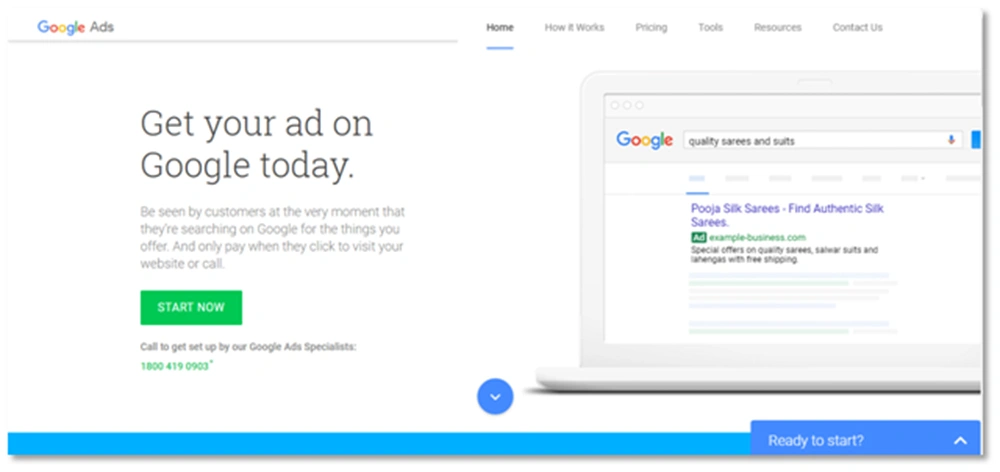
This one is a no-brainer. With the name, Google has also changed the website URL for the Google Ads website andthe other associated tools. Now instead of adwords.google.com, you will have to go to ads.google.com. Once there, you can click on Start Now and it’s as simple as that to start your journey with Google Ads.
Once there, you enter your email address and the URL of your website and then click on Continue.
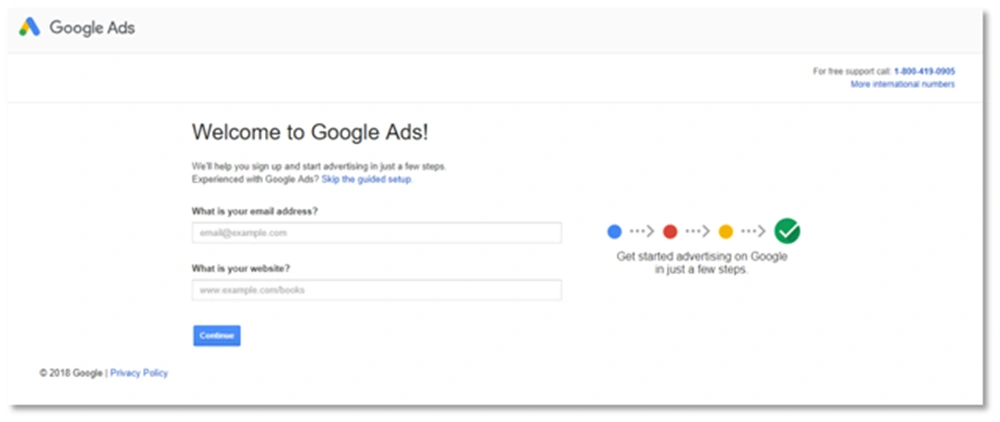
Easy-peasy, right? Now, the next part is just as easy, albeit a bit calculative. Begin by selecting your preferred currency, which right now should be set to that of your country. Then enter in the text box the amount you’re willing to pay per day for your ad campaigns. As soon as you enter the amount, the Machine Learning algorithm will show you your estimated daily reach in terms of the number of clicks and number of impressions.
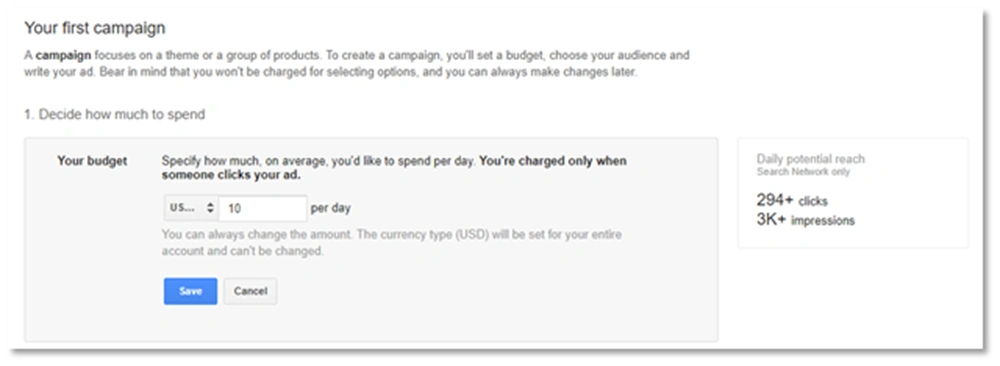
Then, click on Save and proceed to select your target audience. If yours is an international business, you can select the option ‘All countries and territories’. In the case of a local business, keep the tab on the selected country which, by default, is yours and then proceed. However, if with this ad campaign you wish to target a specific location on the globe, Click on, ‘Let me choose’ option and select your preferred location from the drop-down menu.
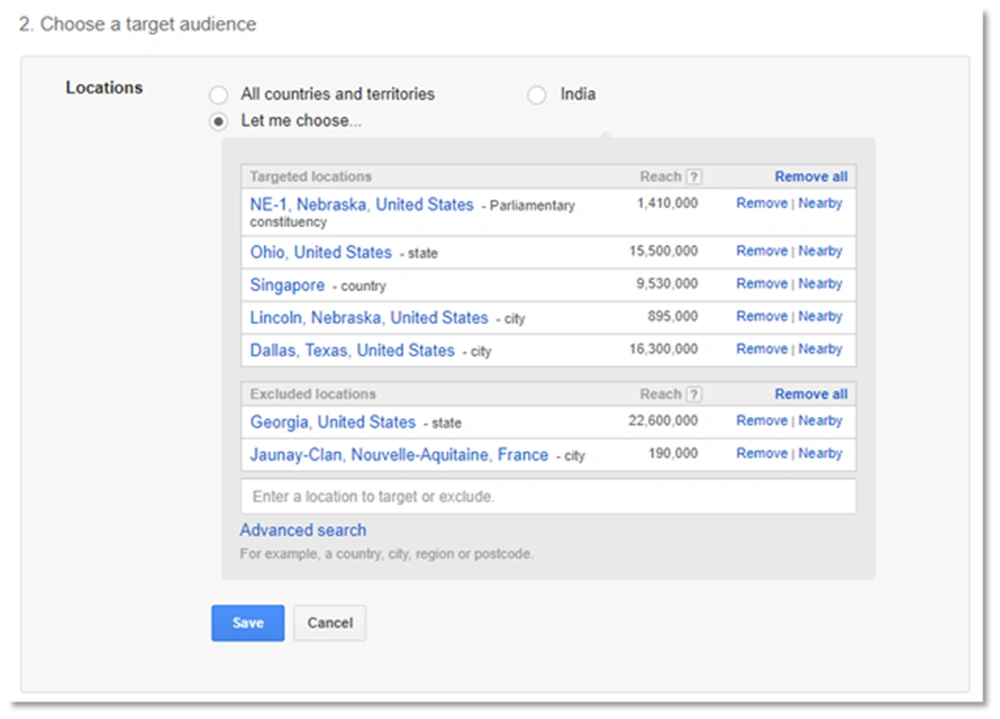
Note how you can select any location here that you wish to target. That means you can target specific areas such as a parliament constituency, city or an entire country. As well as this, you can also exclude certain areas where you do not want your ad to appear, to prevent messing with your other marketing campaigns or to prevent unqualified clicks. There’s also the option for selecting a nearby location which you can use if you wish to discover newer markets around your business. Once you have selected your areas, click on save and move on to the next step and choose whether or not your ad should appear on display networks as well.
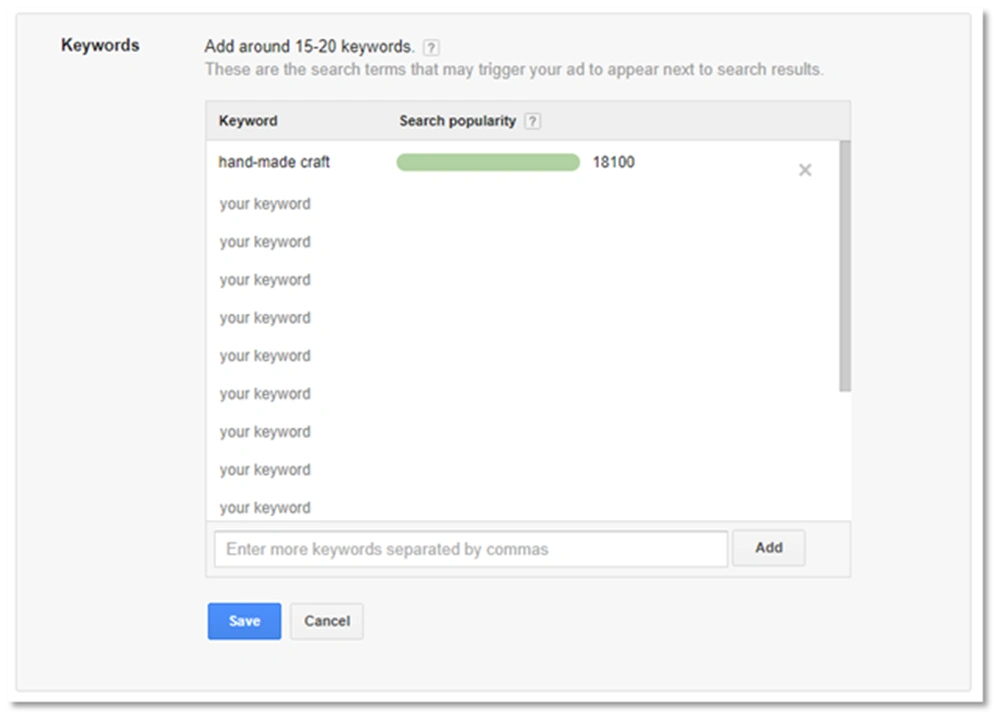
Up to this point, it was all about the personalisation of your account. But with this step, you will officially start building the ads for your services and products. You can start by selecting the keywords you would use if you were the customer looking for the services similar to yours. But if you want to get more sophisticated with your attempts, you can take help from tools like Keyword Planner. There you will get enough information about the search terms your potential customers are using. You will also get exclusive information on what is the competition level over those terms, and how competitors are bidding on these. Once you’ve selected those keywords, add those to the group, or campaign for later use, or simply manually copy and paste these in this section.
After selecting the keywords, you can manually place your bids, or let Google make the decision for you. This bid is the maximum amount you are willing to pay for each click. Note how we emphasised on maximum amount. This isn’t the exact amount you will pay for one click on your ad unless your bid is the lowest for the keyword and your ad somehow got selected for display, or you are the only bidder for that auction, only in these two cases will you pay the whole amount of your bid. Usually though, algorithms decide whether or not they should display your ad depending on your ad rank, which is calculated on the basis of your maximum bid amount and the quality score of your ad. Quality score of the ad itself depends on a number of factors including the relevance and quality of the ad copy and the landing webpage. Then the amount charged for the click is calculated on the basis of the closest lower bid. A high-quality score is often termed as the best way to optimise the ROI on PPC campaigns.
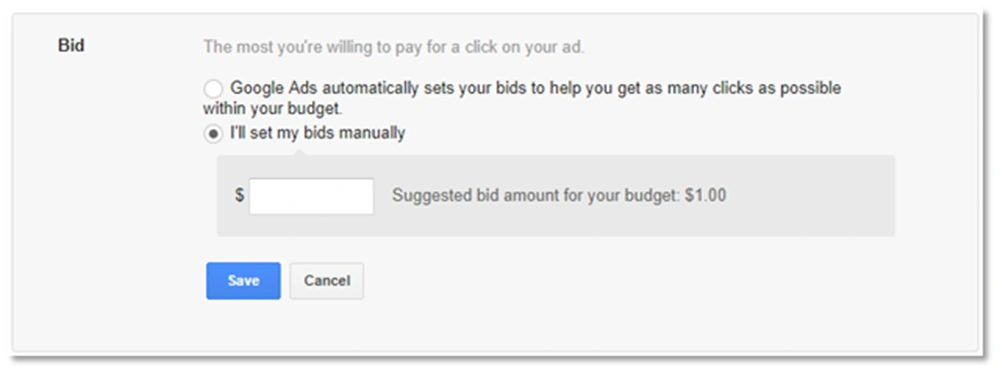
Therefore, when you manually place the bid you have to make certain calculations on the bids of the keywords, and then optimise it for your goal. This is why this approach is only used by the people who have dedicated resources working on their campaign. But if you’re managing your campaign by yourself, besides managing your actual business as well, it’s ideal to let the Google Algorithm take care of this overhead for you.
Now you’re finally at the stage where you can place the ad for your services. If this is the first time you’re writing an ad copy for Google, you can begin by looking at the ad copies of your competitors. Though there are multiple tools available to do that, for the beginning, let’s not make it more complicated. So instead of using a tool, where you will have to do a complete competitor analysis, head over to the best free tool you already have, that being Google Search. For the keyword(s) you have just chosen, perform a google search.
You can also modify your search term to include your keyword in a way that a genuine search would. As overtime, PPC executives and the Google algorithm are evolving to sift through for genuine searches before showing any results for improved ROI on search ads. So if you are into the business of imitation jewellery, instead of simply placing the keyword as it is in the search box, write a query like a customer. Something like ‘Buy imitation jewellery for prom’ or ‘Imitation jewellery shop near me’. Then separate the organic results from the paid ones and see how the top performers are competing for the ad positions.
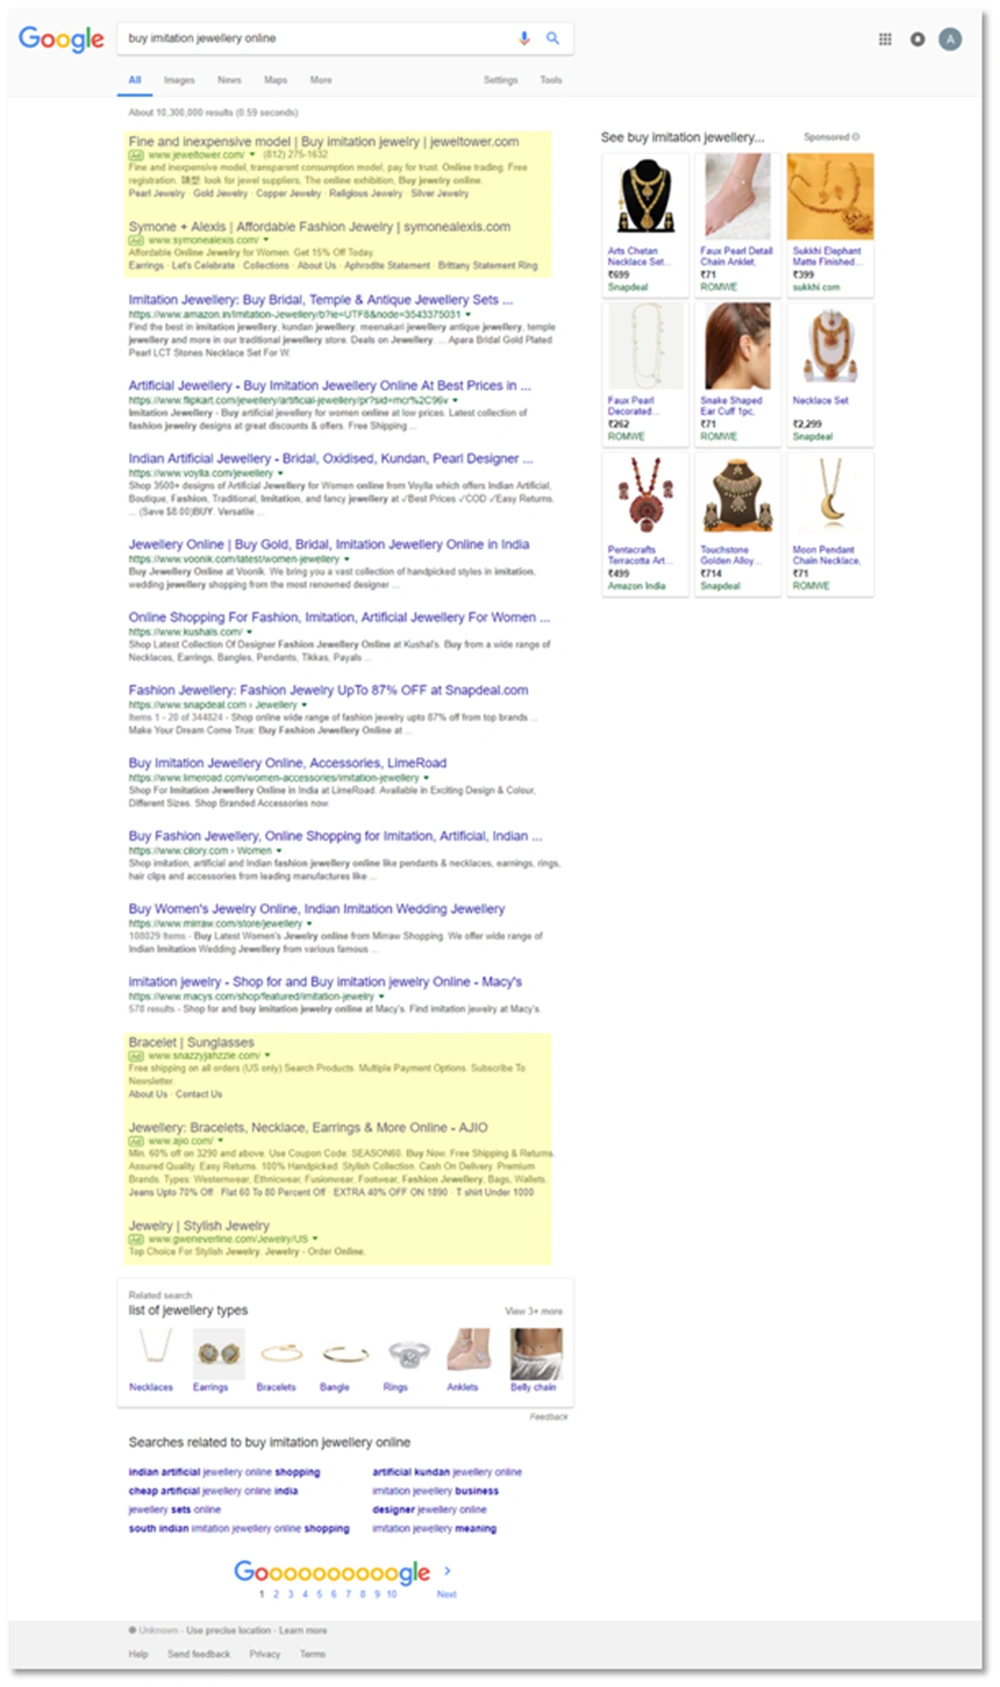
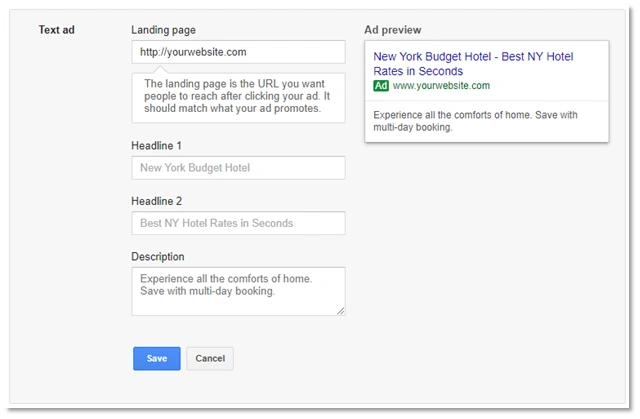
Now use permutations and combinations of the ad copies you’ve just seen, and customise it for your specific trade. Once that’s done, you can place your ad copy in the form. Text in the Headline 1 will appear in the ad copy before the separator, and Heading 2 after it. The description comes below the URL of your landing webpage. It is always recommended to add CTAs or Call-To-Actions in the Heading 2, as well as description of the copy.
After completing this action, you will be redirected to the payment form, where you will have to fill in your payment details. In this form, you will also have to enter the tax information and other corresponding fields depending on the country you’re in. There are no best practices involved in this section, you simply have to put in the details as asked. But that’s it. You’ve finally set up your Google Ads account! Now you can add more ads and keywords to your campaigns, and then create specific groups to scale your campaigns and optimise the ads for improved ROI.
Now you can diversify your inbound marketing efforts with Paid search as a strong part of it. This specific handle of inbound digital marketing is known for bringing high-quality leads quickly and directly to you. So once you have that, you can focus onto your other lead-generation tactics to grow your business to the scale it deserves.
Free AI website builders sound great, but the hidden limits, risks, and long-term costs can hurt your business. Learn the truth before you build your next website.
Keep ReadingDiscover 2025’s top digital marketing trends AI, voice search, video, personalization & ethical branding. Stay ahead with Dotsquares’ expert solutions.
Keep ReadingDiscover how Dotsquares elevate modern social media marketing with tailored SMM strategies that boost engagement, build trust, and drive business growth.
Keep Reading